This lesson series I will teach you
the basics of how to use Microsoft Visual Studio IDE with graphical examples.
In previous lesson I teach you what
the Visual Studio 2010 functions are and how to use them in useful manner.
Now I’m going to tell you about the
simple tips of the VS2010 and how to use them in the coding and the design.
Getting know about the VS2010 IDE well means you can use it well for your
future coding practices very easily.
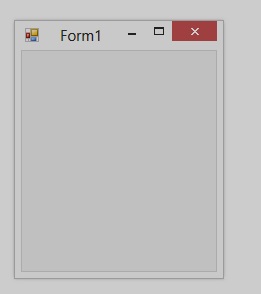
Canvas:

After creating the project you can
see this view in the IDE, this is the design view of the project, this Form is called as canvas. This canvas
can be resize according to the application by just select the corner and
dragging it or go to properties and change the value. You can put any tool which is available in the Toolbox (you can see
it in the left hand corner).
If you double click the tool or just drag & drop that tool in to the
canvas will draw the selected tool in the canvas. Size of the tool can be
change select the tool and change its size using mouse or go to properties and
change the values.
Solution Explorer:

Here shows each an everything that
you create, import in the project. Don’t delete Program.cs which is a must in every project.
Here you can see the design view
file (Form1.cs) and the code view file (Form1.Designer.cs) separately.
According to your need you can view them one at a time. You can add new form or file just
right click the Application name (My First Application) and select the
necessary. You can add existing item or the reference in the same way too.
 You can change the properties of
whatever the tool or the form any time according to the need. Here you can see the properties in
categorized view if you select the left most icon, or alphabetical order in the
current status. But make use do not
change the name properties during the coding, others may acceptable.
You can change the properties of
whatever the tool or the form any time according to the need. Here you can see the properties in
categorized view if you select the left most icon, or alphabetical order in the
current status. But make use do not
change the name properties during the coding, others may acceptable.
Code View:
 Here you can see the code view of
one of the form in the project. Different words in different
colors, there is a reason for that I will explain you in later lesson.
Here you can see the code view of
one of the form in the project. Different words in different
colors, there is a reason for that I will explain you in later lesson.
Toolbars:
The green triangle is the run button, which run the project. If there
is any errors it will show them with the reason and the line. Then programmer
can easily correct them in order to the guidance given by the IDE.
Project can run in debug mode or release mode. According
to the programmers need it can change, but project files save in two different
folders for different purposes.
Error List:
 Errors will display here when you
run the program, then the error, description, line, column and the project also
display here. Then programmer can easily find where is it and what is it and
what should be the solution for that also.
Errors will display here when you
run the program, then the error, description, line, column and the project also
display here. Then programmer can easily find where is it and what is it and
what should be the solution for that also.
Intermediate Window:
 Here all the outputs of the code
will show to the programmer. Some projects files doesn’t contain Forms.
Therefore those kind of files may have some calculations or algorithms which
may give outputs. All those outputs will display here, then programmer can
identify what are they and are the correct according to the code or not.
Sometimes code may run successfully but content may change according to
required code.
Here all the outputs of the code
will show to the programmer. Some projects files doesn’t contain Forms.
Therefore those kind of files may have some calculations or algorithms which
may give outputs. All those outputs will display here, then programmer can
identify what are they and are the correct according to the code or not.
Sometimes code may run successfully but content may change according to
required code.
Output Window:
 This is the final out put that we
can see in the form based project. Simple but fully functional software output
can be experienced here with the live user experience too.
This is the final out put that we
can see in the form based project. Simple but fully functional software output
can be experienced here with the live user experience too.
This is brief overview about the VS2010, which will give you the basic
tips of VS2010 to you. Hope it will help you lot.
Any Questions??
Mail me: call.rohana@gmail.com
For more IT
& IS related topics visit www.uncopyrightables2011.blogspot.com
Very informative and well written post! Quite interesting and nice topic chosen for the post.
ReplyDeleteFujitsu Laptops