This lesson series I will teach you the basics of how to use Microsoft Visual Studio IDE with graphical examples.
To follow this lesson you need to
have Visual C#
Express Edition 2008 or Visual Studio 2010 installed on your computer.
These applications are free to download and install.
In this lesson series I use Visual
Studio 2010 as the IDE (Integrated Development Editor) to do all the
programming and demonstrations.
Let’s begin with VS2010:

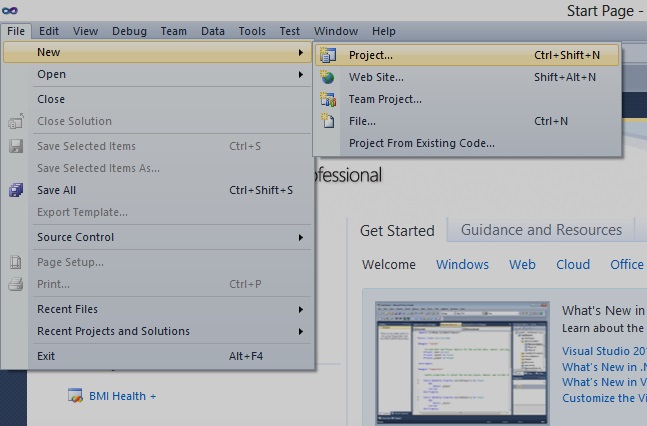
To start with, open your IDE and
create a new project, (There are several ways to do this)
1.
File
>> New >> Project
2.
Start Page
>> New Project

3.
Ctrl +
Shift + N
Now you comes to screen like this,

In here you can see there are
several other applications or programs you can code using this Visual Studio
2010 with C# and you can use several templates for your development.

Not only that you can use several
other .NET related programming languages to do our programming, you can learn
them later.
Now select the Visual C# >> Windows >> Windows Form
Application template from the window that appears.
Give necessary name and the location to save the project, then click
OK.
Now you see screen like this.

From here onwards you have to use this
for your entire C# development projects. It’s really user friendly user
interface for the developers.
From the next lesson you will learn about the components of this IDE and
how to use them properly and easily.
Any Questions??
Mail me: call.rohana@gmail.com
No comments:
Post a Comment